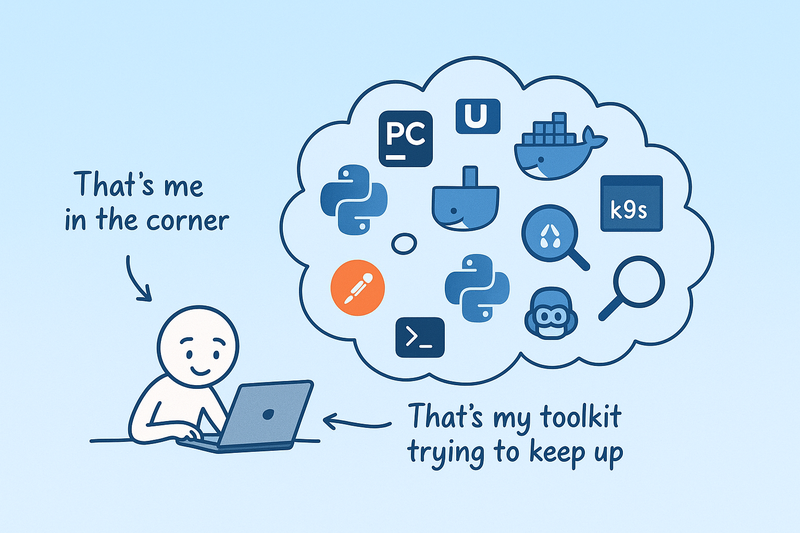
Credit goes to ChatGPT for the image, and to Claude for writing the prompt for ChatGPT
When people are breaking into the field of Data Science or Machine Learning, they usually learn as much python/pandas/numpy/sklearn
as they can. And that’s great - it’s a wonderful way to kickstart your journey, understand
that data is not always clean, that models don’t always work as expected, that there can be discrepancies between
different metrics, and so on. The further you dive into this rabbit hole, the more it becomes just a process -
scientific and engineering. You’re gathering requirements and data, analyzing them, devising models or other approaches,
implementing them, testing, deploying, monitoring, and so on. And you start using more and more tools to help you
streamline each of these steps and complete them faster and with less effort. Other aspects are piling up, like
versioning, code quality, testing, and so on (Bob writes unit tests - be like Bob).
As a Machine Learning Engineer, I use many tools to streamline my workflow. Of course, the toolset generally depends on
the types of projects you’re working on. I, for instance, work mostly on NLP projects like text classification, data
generation, LLMs, LLM-based agents, and so on. I’m involved in data wrangling, production code writing, model training
(sometimes), deployment, monitoring, and so on. Nevertheless, I still use classics like sklearn when I need to
calculate metrics or train a logistic regression. An important note here is that Machine Learning Engineering isn’t only
about data science and machine learning - it’s also about software engineering with all its consequences.
So I decided to compile and share a list of tools that I really use in my day-to-day work. I won’t include programming
languages or specific frameworks like pytorch, but rather focus on tools - additional things apart from text editors
that help me do my job faster and better. As a bonus, I’ll also include a list of tools that I don’t use (I like how
it’s arguable and may easily spark discussions, but it’s still true for me). I hope it’ll be useful for readers as well,
and maybe someone will even discover something new to try and play with. Beginners may find it a good list of technologies
to explore and learn.
Tools that I DO Use a Lot
An IDE (Integrated Development Environment)
Okay, this one is a no-brainer. But it’s still better to mention it explicitly… Don’t get me wrong, writing code in
nano is awesome (and sometimes you just won’t have any other way to edit text files), but it’s not the most efficient
approach for your day-to-day work. I personally use PyCharm (the paid version, of course), but VSCode can also be a
great choice (I know good people who use it; it’s just me who doesn’t like it that much compared to PyCharm).
However, I’d like to emphasize the importance of using an IDE especially for Data Scientists. These folks usually write their code in Jupyter Notebooks, which they share later with engineers and others. Notebooks are really cool for prototyping, verifying that certain things work, or doing one-time tasks. But they are almost unusable for production code, and I can’t stress enough how messy and unmaintainable Notebook code usually is… What worked for us is having a repository split into two parts: one for experiments (with Notebooks, one-time scripts, etc.), and another for reusable components, libraries, and production code. Then you use an IDE to work with the production code, and Notebooks for experiments/analysis only. Fortunately, modern IDEs have excellent support for Notebooks as well, so you can both write production code and experiment in Notebooks within the same environment (until your IDE crashes with OOM or 100% CPU load, but that’s another story).
uv
uv is an “extremely fast Python package and project manager, written in Rust”.
Many people use pip, pipenv, poetry or Anaconda for managing Python packages and virtual environments, but since
I discovered uv, I haven’t looked back. It’s superfast, simple, and does exactly what I need. It creates virtual
environments just like venv, manages packages like pip, and has a simple CLI.
Well, it’s better to see it in action once rather than read a lot of text, so here’s a quick example. Let’s create a
virtual environment for a new project, install some packages, and run a script. We’ll do it in two ways: with uv
and with pip + venv, and compare the time it takes.
We’ll use a simple list of data science-related packages for this demo:
numpy
pandas
scikit-learn
scipy
matplotlib
seaborn
jupyter
plotly
First, let’s do it with pip:
time pip install -r requirements.txt
And the result:
real    4m13.010s
user    0m24.665s
sys     0m12.064s
Time taken to install packages with pip on my laptop
Now let’s do the same with uv. First, we’ll need to install uv itself (obviously), and create a pyproject.toml file like this one:
[project]
name = "my_project"
version = "0.1.0"
description = "My description"
requires-python = ">=3.12"
dependencies = [
    "numpy",
    "pandas",
    "scikit-learn",
    "scipy",
    "matplotlib",
    "seaborn",
    "jupyter",
    "plotly"
]
Then we can run:
time uv sync
And the result:
real    0m48.540s
user    0m4.351s
sys     0m7.376s
Time taken to install packages with uv on my laptop
A dramatic difference that becomes even more significant when you have dozens of packages in your project and update their versions quite often.
Another cool feature of uv is that it automatically creates a uv.lock file, which essentially pins the versions of
all the packages you have installed. This is super useful for ensuring that your project works the same way on
different machines and environments, especially if you’re installing these dependencies later in a Docker container or
on a remote server.
ruff
ruff is an extremely fast Python linter and code formatter, written in Rust. It’s really fast. I mean, really. Compared to other Python linters, of course. Why is that? Because it’s written in Rust. You should get used to it - there are many cool tools appearing in Rust, and they are usually much faster than their Python counterparts.
Anyway, ruff is a linter and code formatter. It checks your code for various issues, like syntax errors, unused
imports, undefined names, quote style, and so on. Everything is configurable in the same pyproject.toml (but it’s
better to agree on some style guide with your team before committing a configuration to your team’s repository,
otherwise expect a lot of 🔥).
In the end, it lets you write your code faster without thinking about proper spacing, quotes, line length, temporary imports, etc. Everything will be checked and fixed automatically, so the resulting code is clean and follows styling guidelines.
pyright / mypy
Both of these are static type checkers for Python. What does this mean? It means that they analyze your code and check if the types of variables, function arguments, and return values are consistent with the type hints you’ve provided. To make it all work, you need to do two things:
- Add type hints to your code (yeah, that can be quite painful in Python, but let’s be honest, no real production code is written without type hints anymore)
- Run the type checker (either pyright or mypy) on your codebase.
Again, let’s see it in action:
def add(x: float, y: float):
    return x + y

# you can't pass string as a float
# (hopefully, you don't even want to do so)
add(1, "")  # <-- ERROR
# Argument of type "Literal['']" cannot be assigned to parameter "y" of type "float" in function "add"
#  "Literal['']" is not assignable to "float"  (reportArgumentType)


# more complicated case with inheritance
class Animal:
    pass

class Dog(Animal):
    pass

class Cat(Animal):
    pass

def add_pet(pets: list[Animal]) -> None:
    # no error, cause Cats are Animals
    pets.append(Cat())

my_dogs: list[Dog] = []
add_pet(my_dogs)  # <-- ERROR
# Argument of type "list[Dog]" cannot be assigned to parameter "pets" of type "list[Animal]" in function "add_pet"
#  "list[Dog]" is not assignable to "list[Animal]"
#    Type parameter "_T@list" is invariant, but "Dog" is not the same as "Animal"
#    Consider switching from "list" to "Sequence" which is covariant  (reportArgumentType)
I personally prefer pyright a bit more due to its speed. It’s also great that you can integrate it into your IDE and
use it instead of the built-in type checker.
Finally, people usually use mypy or pyright in their CI/CD pipelines (e.g., GitHub Actions) to ensure that the code
being merged into the main branch is type-safe, and in pre-commit hooks to check the code before committing or pushing
it to the remote repository. However, it’s important to remember that these tools are not a silver bullet, and you still
need to write tests and do code reviews.
Git
This one is obvious. Git is a version control system that helps you track changes in your code and collaborate with others. There are even plenty of GUI clients and IDE integrations for Git, so you don’t have to use the command line (however, being honest, sometimes it’s just faster or even inevitable, especially if you’re doing something more complex than just committing and pushing changes).
There are other alternatives to Git, but the idea is that you should use some version control. Code history really helps sometimes. Especially if you’re building real production systems.
If you decide to work with more complicated things like datasets, images, etc., you may find Git LFS quite useful. However, there are other tools for dataset management as well.
pre-commit
pre-commit is a framework for managing and maintaining multi-language pre-commit hooks
(just as written on their website). This means that you can use it to run various checks automatically before committing
your code. These checks can include running linters, formatters, type checkers (pyright or mypy, as described above),
or even security scanners (sec-team would give you a + on review for doing that).
Its configuration looks roughly like this:
repos:
-   repo: https://github.com/pre-commit/pre-commit-hooks
    rev: v2.3.0
    hooks:
    -   id: check-yaml
    -   id: end-of-file-fixer
    -   id: trailing-whitespace
-   repo: https://github.com/psf/black
    rev: 22.10.0
    hooks:
    -   id: black
Example of pre-commit configuration file taken from official documentation
Then after running pre-commit install in your repository, every time you try to commit something, the hooks will run
automatically. If any of them fail, you’ll get a nice message about what went wrong, and the commit will be aborted
(you have to fix the issues first, then try again).
One caveat here is that if your repository is huge, then running a type checker or linter on the whole codebase may take a while. Another problem I’ve faced is when you’re merging a branch with conflicting changes - it can be hard to resolve them correctly so that the type checker/linter is satisfied. This may lead to some “breakages”, especially if you’re using an IDE to do so (just as I do). And of course, you won’t be able to commit any “temporary code” until you fix all the issues. I solved this problem by using not a pre-“commit”, but rather a pre-“push” hook, so that I can commit any garbage I want, but it all looks good in my PRs on GitHub :) This works best if you’re squash-merging your PRs, so that the commit history in the main branch is clean and tidy.
default_stages: [push]
repos:
  - repo: https://github.com/astral-sh/ruff-pre-commit
    rev: v0.9.8
    hooks:
      - id: ruff
        args: [--fix]
        stages: [push]
      - id: ruff-format
        stages: [push]
My pre-commit configuration file for pre-push hooks
iTerm (Terminal)
Being familiar with the terminal is a must for any software engineer (even for ML Engineers, in my opinion). Navigating the file system, running scripts, installing packages, managing Git repositories, making requests, connecting to remote machines or clusters, running and managing Docker… This list is almost endless. For some of these tasks you can use a GUI, but it’s usually much, much faster just to type a few commands and hit Enter.
I won’t say that I’m a master of the terminal though. Fortunately, LLMs are getting better and better at writing shell scripts. But you have to be able to read and understand what’s happening (and tweak it, of course).
IPython
IPython is an interactive Python shell that has a lot of cool features compared to the standard Python REPL (it’s worth noting that since Python 3.14, the default REPL has become much more powerful and user-friendly). It has syntax highlighting, autocompletion, magic commands, and so on.
IPython is super useful for quick experiments, data exploration, testing small snippets of code, and so on. It’s also great for debugging, as you can run commands step by step and inspect variables.
I have an IPython shell always open in PyCharm, so that I can quickly test some library code I just wrote, or check how some function works, or even do some quick calculations or HTTP requests. Of course, any pandas/JSON wrangling is much easier in an IPython shell (God, I probably would never remember the entire pandas API…).

A snippet of my IPython shell
Docker and Docker Compose
Docker is essentially a tool that lets you package your entire application and all its dependencies into a “container” that can run anywhere (well, depending on the platform you’ve built it for, but let’s not go into details). It ensures that your application works the same way on your local machine, on a remote server, or in the cloud - wherever you actually deploy and run it. It is currently the de facto standard for packaging and deploying applications, and you should definitely try playing with it if you plan on building some real apps.
I’ll be honest - it isn’t a very simple technology, and understanding all the peculiarities of its internal mechanisms will take some time. It involves OS-level virtualization, file system layers, networking, and so on. But the really good thing about Docker is that it takes almost all the complexity away from you, and you can just use it without knowing all the internal details. What’s left for you is to learn basic concepts like images, containers, Dockerfiles, volumes, networks, practice a bit in writing Dockerfiles and use them in your projects, and learn some CLI commands.
All work with Docker starts with writing a Dockerfile, which is a text file that contains instructions on how to build
a Docker image for your application. It includes things like the base image to use (e.g., Python version, or an image
with pre-built GPU dependencies, or even another image of yours), the commands to run, the files to copy, the ports to
expose, and so on. The simplest Dockerfile for your application may look like this:
FROM python:3.12-slim
WORKDIR /app
COPY . .
RUN pip install -r requirements.txt
CMD ["python", "main.py"]
A simple Dockerfile for a Python application installing dependencies from requirements.txt and running main.py
Next steps involve:
- Building a Docker image from the
Dockerfile - Optionally pushing the image to a Docker registry (a place where all your images are stored)
- Running a container from the image or deploying it somewhere
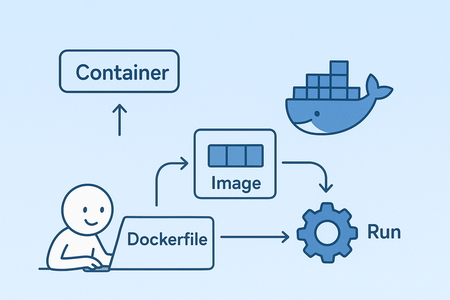
Docker workflow (a little messed up by ChatGPT)
Another cool thing about Docker is that there are many pre-built images for various applications, so you can just pull them from Docker Hub (or your internal registry) and use them right away. You don’t have to set up a Redis server, or a PostgreSQL database, or a Jupyter Notebook server - just pull the image and run it.
Finally, if your application consists of multiple services (e.g., a web server, a database, a cache, etc.), or you just don’t want to mess with CLI commands, you can use Docker Compose to define and run Docker applications. It allows you to specify all the building and running options in a readable, user-friendly YAML configuration format (but again, being honest, I rarely use it since locally I mostly run them using CLI commands, and for deployment I use other mechanisms).
version: '3.8'
services:
  app:
    build: .
    depends_on:
      - db
    environment:
      - DATABASE_URL=postgresql://postgres:postgres@db:5432/postgres
    ports:
      - "8000:8000"
    volumes:
      - .:/app
  db:
    image: postgres:16
    environment:
      - POSTGRES_USER=postgres
      - POSTGRES_PASSWORD=postgres
      - POSTGRES_DB=postgres
    ports:
      - "5432:5432"
    volumes:
      - pgdata:/var/lib/postgresql/data
volumes:
  pgdata:
A simple Docker Compose configuration file for a Python application with a PostgreSQL database
Note: Docker isn’t actually that free (well, the technology itself is, but the Docker Desktop application is not). You can use Docker Engine on Linux for free, but if you’re on Windows or Mac, you’ll have to pay for Docker. And there are alternatives like Podman or Rancher Desktop, but I’d say that’s a bit more complicated scenario.
Kubernetes
Kubernetes (or K8s) is an open-source system for automating deployment, scaling, and management of containerized applications (sounds complicated, right?). In simple terms, it’s a tool that helps you manage and orchestrate multiple Docker containers across a cluster of machines (nodes, actual computers that do the computing). It takes care of things like load balancing (sending requests to different instances of your service to avoid overloading), scaling (creating new instances automatically if there’s a need), rolling updates (updating and redeploying your applications when there’s a new version), and so on.
This one is definitely not a tool for beginners, and you won’t need it until your application grows big enough to require it. But if you’re working on a real production system, especially in the cloud, you’ll probably have to deal with it. Fortunately, there are usually specialized people who handle it (DevOps engineers, SREs, etc.), but it’s still essential to understand the basic concepts and how it works. I remember learning about it from several multi-hour videos on YouTube, and then practicing a bit on my own cluster in the cloud. Again, unless you are a DevOps engineer, you probably shouldn’t dive very deep into all the peculiarities. But knowing how it works and what happens after you’ve finished training your BERT is definitely a must.
k9s
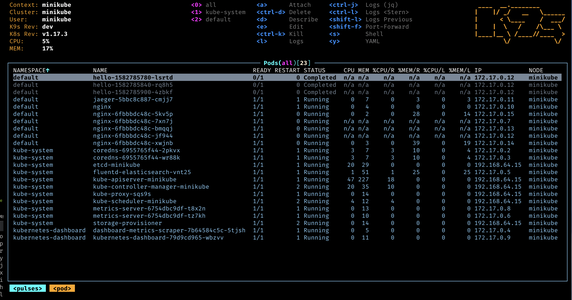
k9s screenshot from the official website
k9s is a terminal-based UI to interact with your Kubernetes clusters. It makes it much easier to navigate, manage, and monitor your K8s resources without having to remember all the CLI commands. You can view your deployed applications, pods, deployment scripts, workloads, read logs, and even attach to a running container and perform operations there.
All this is possible using standard K8s CLI commands, but k9s makes it much more user-friendly and efficient
(everybody loves interactive UIs, right?).
MLflow
MLflow is an open-source platform to manage the ML lifecycle, including experimentation, reproducibility, deployment, and a central model registry.
When you train a model or perform experiments, you usually want to keep track of various parameters, metrics, artifacts, and so on. If you do this on a remote machine (e.g., a cloud VM with lots of GPUs), then it’s not that easy to access these files later. It’s even more important if you’re working in a team and you want to share your results with others. This means you need some kind of centralized place to store all this information, and MLflow provides exactly that.
The workflow is quite simple: you set up an MLflow server (local or remote; there are even Docker containers for MLflow as well), install the MLflow library in your Python environment, and use its API to log parameters, metrics, or even files like charts and confusion matrices. The logging is performed using its Python API - you just call some functions, and that’s it!
import mlflow
import mlflow.sklearn
from sklearn.ensemble import RandomForestRegressor
from sklearn.datasets import load_diabetes
from sklearn.model_selection import train_test_split
import pandas as pd
# Set remote MLflow server URI
mlflow.set_tracking_uri("http://your-mlflow-server:5000")
# Start a new MLflow run
with mlflow.start_run(run_name="example_run"):
    # Log parameters
    mlflow.log_param("n_estimators", 100)
    mlflow.log_param("random_state", 42)
    # Prepare data and train model
    X, y = load_diabetes(return_X_y=True)
    X_train, X_test, y_train, y_test = train_test_split(X, y, random_state=42)
    model = RandomForestRegressor(n_estimators=100, random_state=42)
    model.fit(X_train, y_train)
    # Log metrics
    score = model.score(X_test, y_test)
    mlflow.log_metric("r2_score", score)
    # Log model
    mlflow.sklearn.log_model(model, "model")
    # Log an artifact (e.g., a CSV file)
    df = pd.DataFrame({"score": [score]})
    df.to_csv("score.csv", index=False)
    mlflow.log_artifact("score.csv")
An example of logging data to MLflow server
Note: MLflow isn’t the only tool for this job. There are other alternatives like Weights & Biases, Neptune.ai, and so on. Companies that make such solutions compete with each other, trying to make their products better (as large AI/ML companies pay a lot of money to use them), so you can choose whatever you like. For me, it just happened that MLflow was the first one I tried, and it works just fine for my needs.
Postman
Postman is an API client that makes it much easier to create, share, test, and document
APIs. If you’re working on a project that involves building or consuming APIs (and it usually does), Postman is a
must-have tool. Essentially, it’s a GUI for curl with extra features. But since everybody loves GUIs (we already know
that from previous sections), it’s a must-have.
What I really like about Postman is that you can organize your GET/POST/PUT/DELETE requests into folders, fill in all the necessary headers and body, use variables (yes, Postman does support variables for, e.g., base URLs or auth tokens), and save everything for later. Next time you need to test your API - just open Postman, select the request you need, and hit Send.
I don’t really use the sharing feature for now, but even in single-player mode, Postman is super useful.
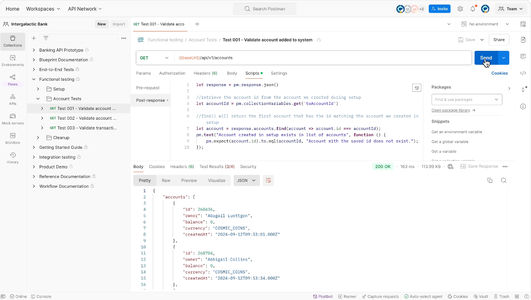
Postman screenshot from the official website
Devpods
This is where things get really fascinating! Devpods (e.g., DevPod by loft.sh) are reproducible development environments running in remote VMs or Kubernetes clusters, usually configured using devcontainers.json files. You can think of them as lightweight, cloud-based development environments that can be spun up quickly and easily, providing a consistent workspace regardless of the local machine setup. You then connect to these remote environments using your terminal or an IDE (both PyCharm and VSCode support remote development; however, being honest, I had to spend some time properly configuring the setup in PyCharm) and work as if you were working locally. I mean, really, in PyCharm it looks and feels like you’re working locally - it’s the same IDE, (almost) the same features and responsiveness, but all the code and dependencies are in the remote environment, and everything runs there, on the remote machine.
What’s even better is that you can have multiple such environments for different projects and switch between them easily. Of course, you have to be aware of file synchronization, networking, and so on, but with proper setup, it becomes a game-changer. Need a powerful CPU machine? Just spin up a Devpod with a powerful VM in the cloud and connect to it. Need a GPU for training your model? Shut down your current CPU machine, spin up a new Devpod with a GPU, and continue working. No need to install anything locally, no need to worry about dependencies, no need to mess with your local setup. Just work.
Moreover, since Devpods are usually based on containers or VMs, you can have a clean environment every time you start.
And this environment can be easily shared with your team, ensuring that everyone works in the same setup (for example,
using the same devcontainers.json file with the same Docker image).
I won’t lie - it requires some initial effort to set everything up properly, and there are still some rough edges (e.g., latency issues, file synchronization problems, using Git on remote K8s pods, etc.), but the benefits are definitely worth it.
GitHub Copilot
We (already) live in the age of AI-assisted programming. That’s just a fact. However, all LLM-based code assistants are just tools, and you have to use them properly to get the best results. In my opinion, simply giving them a concise description of what you want and asking them to write code for you isn’t enough. You have to be more specific, provide clear scope and context, and guide the model throughout the entire process. It’s you who is the architect, and it’s you who will later be responsible for the code quality, correctness, and maintainability (and it’s also you who will be blamed by your teammates and manager if something goes wrong).
Somewhere on Reddit
So I’ll start with a “safer” option - GitHub Copilot. I use it directly in PyCharm and primarily for two purposes: code completion and simple Q&A sessions where I need to remember the pandas API for the fifteenth time this week.
Code completion is almost the same as in regular IDEs, but here you get suggestions based on the context of your code (the so-called “fill-in-the-middle” approach). It works really well for boilerplate code, repetitive patterns, or when you’re trying to remember some specific syntax or API usage. From my experience, it works best for completing either a single line of code or a repetitive block like if/switch-case statements, data processing pipelines, etc. After a couple of lines, it usually goes insane, but that also depends on the model you’re using. Anyway, I found it super useful, especially for exception messages, logging statements, or docstrings. It really speeds up the coding process and helps me focus on the logic rather than strings/boilerplate.
For the Q&A sessions, I use GitHub Copilot Chat, which is an extension of Copilot that allows you to have a chat-like interaction with the model directly in your IDE. It also loads the relevant context from your files, so you can ask questions about your codebase, get explanations, or even request code snippets. I mostly use it for quick reminders on how to use some libraries or APIs (pandas, numpy, sklearn, etc.), or for generating small utility functions or bash scripts. I really loved it when I was analyzing some messy data in Jupyter Notebooks, as I completely suck at using matplotlib/seaborn for plotting. It helped me generate the code snippets I needed in seconds - with just my prompts of what I wanted to see on the plots. Awesome!
Codex
Going further into the AI-assisted programming world, we have OpenAI Codex. It is a coding agent from OpenAI that runs locally on your computer and can do stuff that pretty much any other LLM-based coding agent can do. It still has 0.* version, so you may expect some rough edges and bugs (boy, how I hated it at the beginning…), but overall it works quite well for me. What I really like about it is that it’s open source and very customizable. You’re not bound to a specific model provider like OpenAI or Anthropic - you can use any LLM you like, including open-source ones - just configure Codex properly.
Generally speaking, I’m on the darker side of the Moon on this question. I mean, I prefer the old-school approach to programming where you’re in charge of the architecture and the codebase. I’m not a big fan of the “let the AI write the code for you” approach, as I believe it leads to messy, unmaintainable codebases. I mean… it really does. I’ve seen multiple times what these coding agents produce when left alone, and it’s usually a pile of garbage that nobody wants to maintain. You’re writing in Python 3.13? Great! Your coding agent will be writing in Python 3.7, at best. You want to use type hints? Sure, your coding agent will ignore them completely. You want to follow some style guide? Nope, your coding agent will produce code in its own style. And so on.
But I can’t deny the progress. These coding agents are truly amazing, and they’re getting better every day. So I use Codex as a co-pilot that sometimes takes over certain parts I don’t like doing myself:
- Writing tests (unit tests, integration tests, etc.). LLMs excel at generating tests based on function signatures and docstrings. Don’t forget to review and tweak them a bit, though.
- Writing one-time scripts (data processing, visualization, metrics analysis, etc.). These are usually boring and require neither good architecture nor maintainability, so letting the AI write them is a good idea. Just provide a clear prompt and context, and let the model do its magic.
- Refactoring small classes or modules with clear scope and functionality. It doesn’t require much thinking or deep understanding of the architecture, so it’s a good fit for AI assistance (you may think of it as a junior developer trying to learn from your experience). Again, review the code afterward.
- Implementing your ideas into code when the architecture is already defined. You know what you want to achieve, you have a clear plan, and you just need some code to implement it. Provide a clear prompt and context, describe inputs and outputs, describe your architecture in detail, and let the model generate the code for you. It really works well when you have a clear vision of what you want to achieve.
The latter one still should be taken with caution, as sometimes the model may just “not believe you” and keep trying to implement its own vision of the architecture. I’ve seen it trying to write a small proxy wrapper that proxies calls to an inner object. DFS naturally appears here, as a proxy of a proxy will simply call the final inner object at the end, but boy, the model just couldn’t understand this simple fact and kept trying to implement some weird “proxy-object mappings” and loops, just to implement this DFS that’s already there by design.
class SomeProtocol(Protocol):
    def do_something(self) -> Any:
        ...

class AnActualObject(SomeProtocol):
    def do_something(self) -> Any:
        return "Doing something!"

class Proxy(SomeProtocol):
    def __init__(self, inner: SomeProtocol):
        self._inner = inner

    def do_something(self) -> Any:
        # Simply delegate the call to the inner object
        return self._inner.do_something()


a = AnActualObject()
b = Proxy(a)
c = Proxy(b)
print(c.do_something())  # Output: Doing something! - DFS happens naturally, no extra code/loops/maps needed
These are powerful tools. But they’re still tools. You have to use them wisely and remember that “with great power comes great responsibility.”
Things that I Rarely Use (but Still Find Useful)
Jupyter
Jupyter Notebooks are super useful for prototyping, data exploration, and analysis. But they’re more of a Data Scientist’s tool rather than an ML Engineer’s. However, sometimes I do use them for quick experiments, data visualization, or creating baseline models quickly.
Don’t forget though that Notebooks are still code that someone (including you) may find useful later. So commit them to your repository as well, and try to keep them clean and organized (create a separate folder for them, like “notebooks”, “experiments”, “junk”, etc.). I’ve rarely seen them being properly maintained in production codebases though…
Scikit-learn
Scikit-learn is an amazing library for classical machine learning algorithms. You’ve probably used it a lot during your studies or in your first ML projects on Kaggle. However, it’s rarely used in real production systems nowadays. At least, from my personal experience. Many problems today are solved using deep learning approaches and libraries like PyTorch or more high-level ones like Transformers or Diffusers.
However, I still love sklearn for its simplicity, well-designed API, and wide range of both ML models and utilities (preprocessors, metrics, train-test splitters, and so on). The developers did a really great job there in simplifying data visualization and model evaluation, e.g., plotting calibration curves or fitting isotonic regressions.

Linear and Isotonic regression examples from Wikipedia
Another great thing about it is that many libraries borrow its API design and are compatible with sklearn models (or any model that you make sklearn-compatible by implementing proper methods). For example, I like wrapping a CatBoost model into an sklearn-compatible class and using it with libraries like Cleanlab for dataset quality analysis, or with MLflow for model logging.
Deep Research
Going back to the AI hype, I just have to mention Deep Research solutions. There are many of them nowadays; one person might favor OpenAI’s, another might prefer Anthropic’s, Perplexity’s, and so on.
At their core, they’re just powerful LLMs with tool-calling abilities and a set of pre-defined web-search and data
analysis tools, of course. So these are agentic systems, meaning that they can both reason and act. Sometimes these
LLMs are additionally fine-tuned to perform research tasks better (e.g.,
o3-deep-research by OpenAI).
These solutions allow you to ask complex research questions and get detailed answers with references, citations, and even data analysis. You can ask them to find relevant papers, compare different approaches, explore a new subject, and so on.
My success stories include things like finding sources for specific datasets, compiling a “current state of the art” list on a particular topic (e.g., “context management in LLMs”), and so on. Of course, you shouldn’t blindly trust these models, but they’re a great starting point for your own research. It’s like having a good research-focused blog post written for you in minutes (I remember that before such tools, I had to open dozens of blog posts and articles and go through them just to get a better understanding of a topic; now I just go through a deep research output, read several relevant papers and blog posts, and that’s pretty much it).
The downside is that these solutions are usually paid (at least, the good ones are). Hopefully, either you or your company can afford it.
Tools that I Really DO NOT Use
Anaconda
Anaconda is a popular distribution of Python and R for scientific computing and data analysis. It comes with a lot of pre-installed packages and tools, including Jupyter Notebooks, pandas, numpy, and whatever you can imagine. It’s like a specialized environment, with its own package manager, interface, and everything else. Many people usually start with it because it simplifies the setup process for data science projects. Many years ago, I started with it as well.
However, as you progress and start working on more complex, real-world systems, you’ll quickly hit the limitations of
Anaconda. Managing dependencies, creating reproducible environments, working collaboratively, and deploying applications
becomes much more complicated. That’s where you turn to more flexible and powerful tools like uv, docker,
kubernetes, and so on.
It’s probably okay to use it for pure data science projects, but ML Engineering usually requires more robust and scalable solutions.
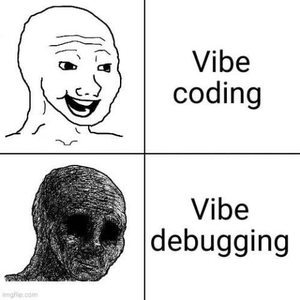
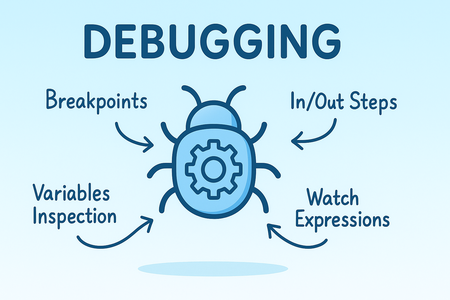
Debugger
Everyone who learns programming starts using debuggers on like day one. Breakpoints, step in/out, variable inspection, and so on and so forth. Pretty much every IDE has a built-in debugger now, and it’s super useful for beginners to understand how code works and why it doesn’t work as expected.
Debugging intensifies with the help of AI
However, there’s one caveat here. You can debug code that is running either locally or on a remote machine with proper setup (remember devpods?) in your IDE.
Now, imagine a real production system. Let’s say it has several microservices running in Docker containers on a Kubernetes cluster (using several programming languages, of course), several databases, caches, and so on (not even talking about load balancers, CDNs, and other infrastructure components). And imagine that you’re seeing an exception in your logs (stored somewhere in Elastic, of course). How would you debug it? Take into account that any correction will also have to go through the entire CI/CD pipeline, including tests, image building, deployment, cache invalidation, and so on. It literally may take hours to see the effect of your fix. You have to be extremely careful here. And you have to think in advance about what will happen with the code you’ve written and how it will affect the entire system. Debuggers won’t help you here. That’s why I really like solving problems on a white paper - it forces you to think through the entire logic and architecture of your code before actually running or even writing it. You actually have to “test your code in your head” before deploying it. Without this skill, you won’t survive in real production systems.
Don’t get me wrong - debuggers are still super useful for local development and writing small, well-scoped functions. But they may prevent you from thinking through the entire logic and architecture of your code, essentially slowing down your growth as a software engineer.
Cursor
Cursor is another AI-powered code assistant (IDE, actually) that helps you write code faster and “better”. I specifically put “better” in quotes, as from my experience it doesn’t really help with code quality or architecture. I’ve seen these thousands of lines of boilerplate spaghetti code generated by Cursor, and it was a nightmare to review PRs created with it. In my opinion, a developer shouldn’t give that much control to an AI assistant. An AI assistant should assist you, rather than turn your hardly comprehensible ideas into even more hardly comprehensible code.
Again, it’s good for prototyping, implementing one-time scripts, or generating boilerplate code that doesn’t require much thinking. But I wouldn’t recommend it for writing real production-grade systems. At least, not now, not until these models get much better at understanding architecture and improve their perception of code quality.
Conclusion
This long-read is just a glimpse into the vast world of tools and technologies that ML Engineers use daily. I wouldn’t call myself representative of the ML Engineering community as well, as every engineer has their own preferences and workflows. Image-focused folks or Data Scientists may completely disagree with me on some points, and that’s okay. I just hope that it will help you navigate this complex landscape of ML Engineering and find the tools that work best for you. Especially if you’re building NLP-focused systems like I do.